How Cold Should Your Fridge Be? A 15-Minute Reset
Ad As an Amazon Associate I earn from qualifying purchases. How this works
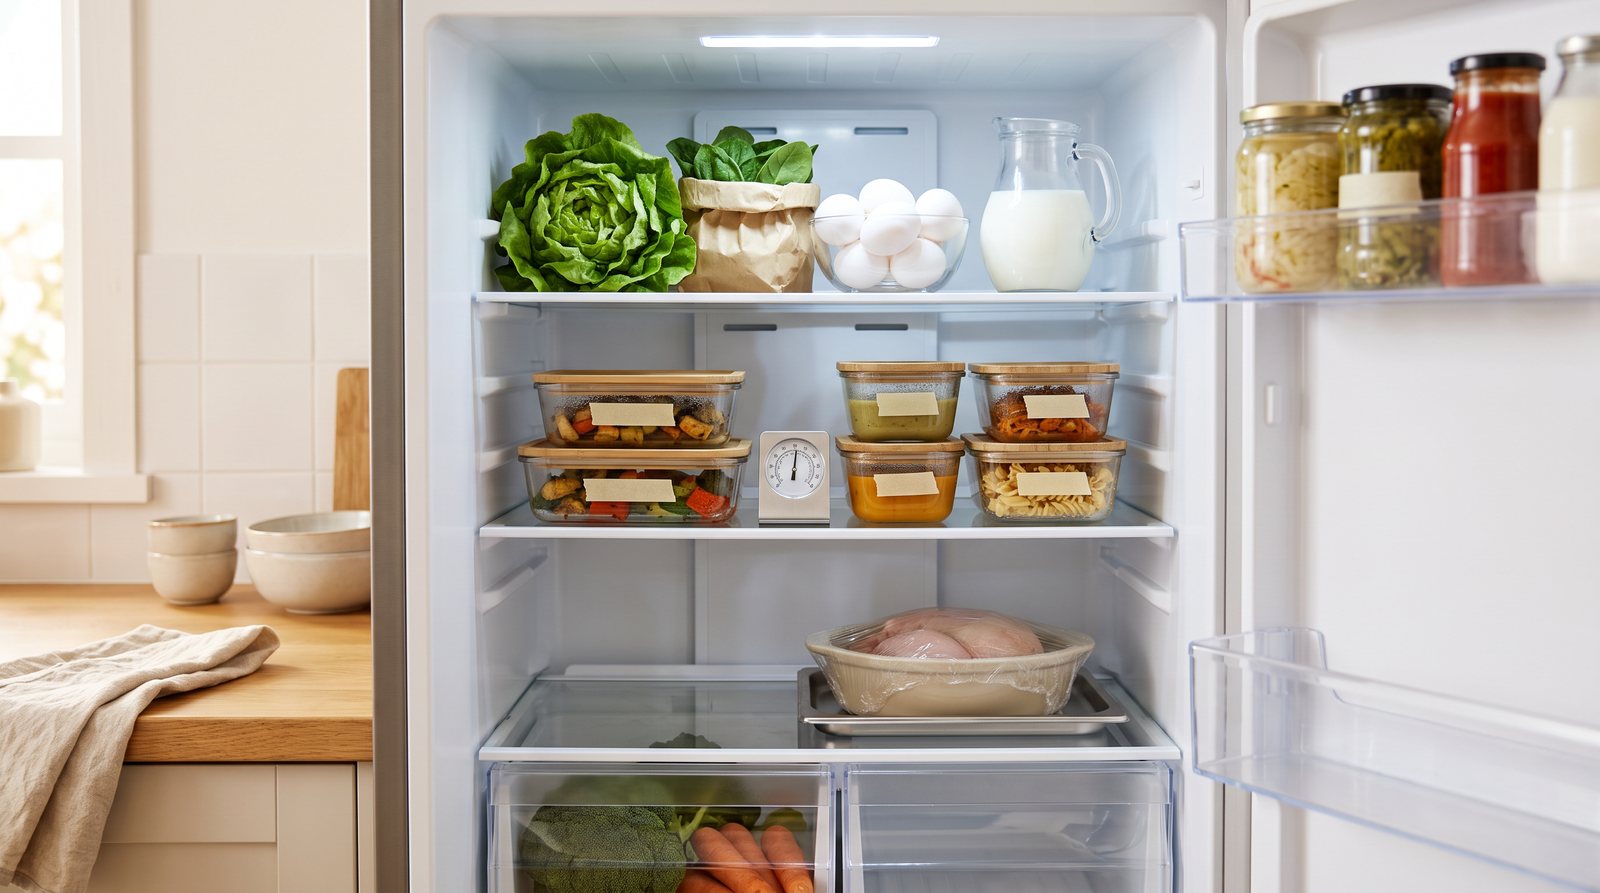
Your fridge works every hour of the day, and most of us never check what it is actually doing. A short Friday reset means you start the weekend knowing what you have, what needs eating first and where everything lives.
Your 15-minute timer
Tap start, then tick each step as you finish it.
Step 1: Check how cold it really is
The Food Standards Agency (FSA) says your fridge should be kept at 5°C or below. The dial inside only sets how hard the fridge works, so it does not tell you the actual temperature. A cheap fridge thermometer on the middle shelf does. One option is the GoveeLife WiFi fridge thermometer on Amazon (affiliate link), a digital model that hangs from a shelf. If the number is above 5°C, set the dial to a colder setting (check your fridge's manual, as the numbers work differently on different models) and check again the next day.
GoveeLife WiFi fridge thermometer on Amazon
Step 2: Pull everything forward and check dates
Take everything off each shelf and look at it. Anything past its use-by date goes in the bin, because the FSA is clear that food should not be eaten after its use-by date, even if it looks and smells fine.
Then look at the leftovers. The FSA advises eating leftovers within two days, or freezing them. If something is close to that limit, decide now what you will do with it this weekend.
Step 3: Re-stack by zone
A fridge works best with a simple logic, a bit like stations in a professional kitchen.
- Raw meat, poultry and fish on the bottom shelf, covered or in sealed containers, so nothing can drip onto other food.
- Cooked and ready-to-eat food above it, away from anything raw.
- Like with like. Keep similar foods together, for example dairy in one place, leftovers in another and things for packed lunches in a third. They are easier to find and less likely to get lost at the back.
Step 4: Label and date
In professional kitchens everything that goes into a fridge or freezer is labelled with what it is and the date it was made. Nobody has to guess. You can do the same at home with a strip of masking tape and a marker kept in a drawer near the fridge. Write the name and the date on every leftover and every prepped ingredient.
Cool cooked food before storing it. The FSA suggests getting it into the fridge or freezer within one to two hours, and splitting a big batch into smaller portions helps it cool faster.
Glass containers with airtight lids make this step easier, because you can portion leftovers, label them and stack them neatly. One option is the Pyrex Cook & Freeze Set of 4 Glass Dishes with Airtight Lids (affiliate link), which comes in four sizes, from 0.8 L to 4 L.
Pyrex Cook & Freeze Set of 4 Glass Dishes with Airtight Lids
Step 5: Plan one "use-it-up" meal
Look at what you found in Steps 2 and 3. Pick one meal for the weekend that uses up whatever needs to be eaten first. Write it on a note on the fridge door. You start the week with a clear shelf and less to throw away.
Was this helpful?
Your answer tells Chef Niko what to fix and what to write next.
No name, no email, no cookies. What we keep.
Tomorrow: a quick kitchen tip you can save and use tonight.
Sources
https://www.food.gov.uk/safety-hygiene/how-to-chill-freeze-and-defrost-food-safely
Read next
As an Amazon Associate I earn from qualifying purchases. Links to products on this page are affiliate links; if you buy through them I may earn a small commission at no extra cost to you. It helps the channel grow. Thank you so much for your support.